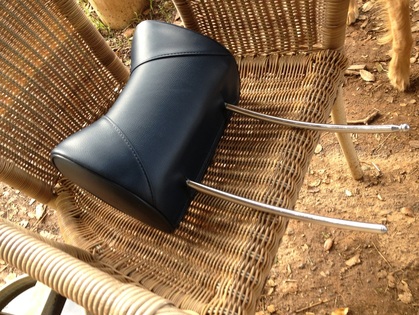
This is a recovered head rest. With care, a utility knife, glue, and wire cutters you can easily recover your head rests. However, there is one part of this that is Very Important!
Please raise your right hand and repeat after me...
I will do everything in my power to make sure I do not destroy, cut, hurt, or in any way damage the foam when I remove the old cover.
Here is the secret two foams for the headrests cost about $600 and that is what I paid for the MB-Tex seat covers for both seats!
Now that you understand how important it is to protect your foam lets begin! Getting the head rest out requires that you push a button to release it. This button is located in the back and you will see it when your remove the rear panel of your seat. You should have a digital camera to record your process to keep everything straight in your head. Start with a picture from the side. Note how there is a front and a back. Look at your new cover. How will it fit? Where is the front? Also; when you do remove your cover the foam may come off the metal holder. Mine did.
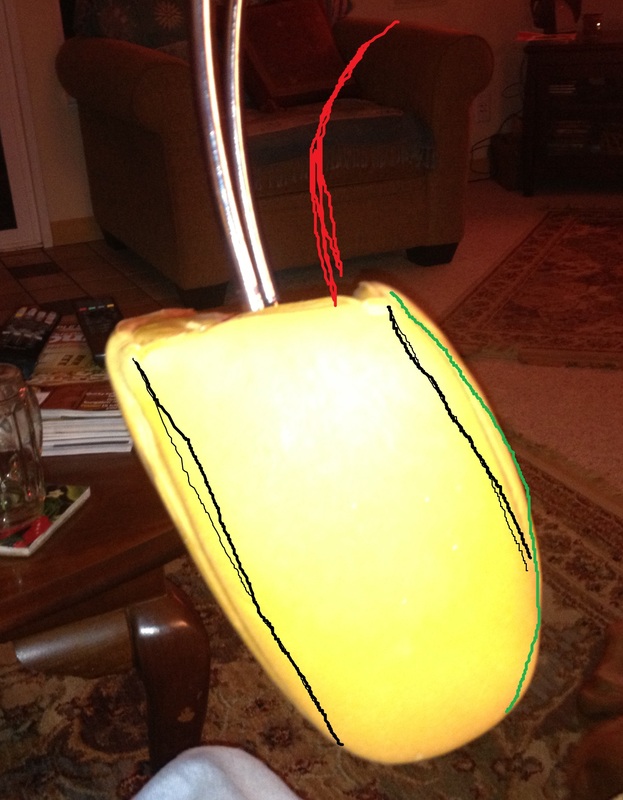
See the colors above. Note the curve of the metal. Also the shorter and longer section front to back
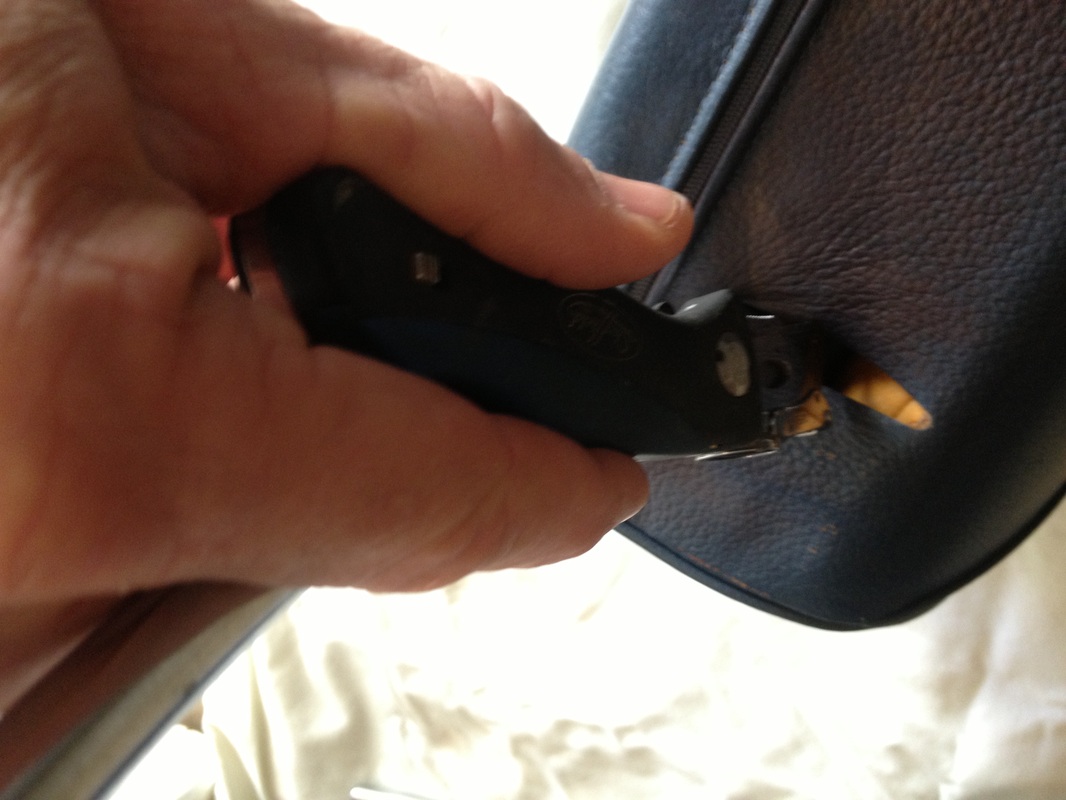
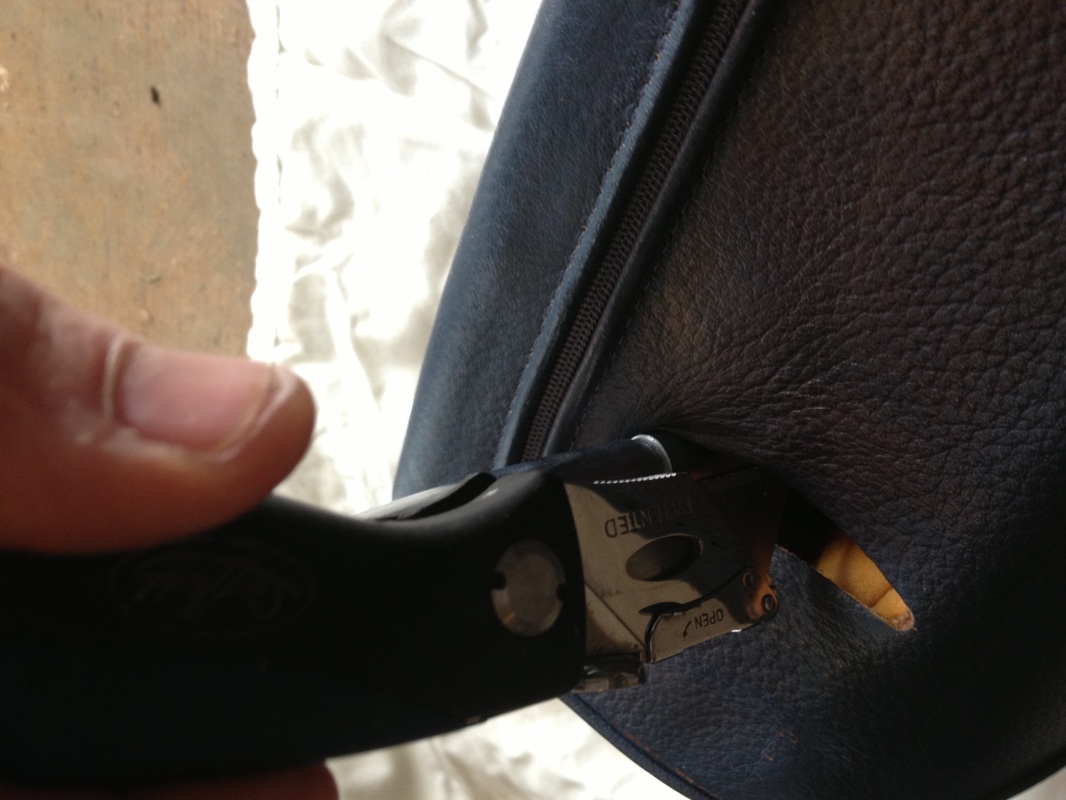
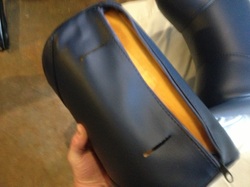
You might be tempted to use the zipper. and if you can get it to open feel free to do so. However; you already pledged to save your foam so you can unzip it if you want to, but I recommend that you use your utility knife to carefully cut off your cover starting at the holes where the metal comes out.
What ever plan you choose save that foam!
What ever plan you choose save that foam!
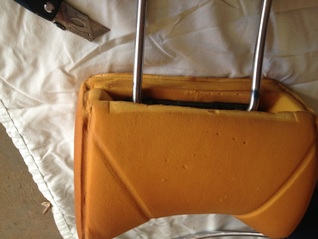
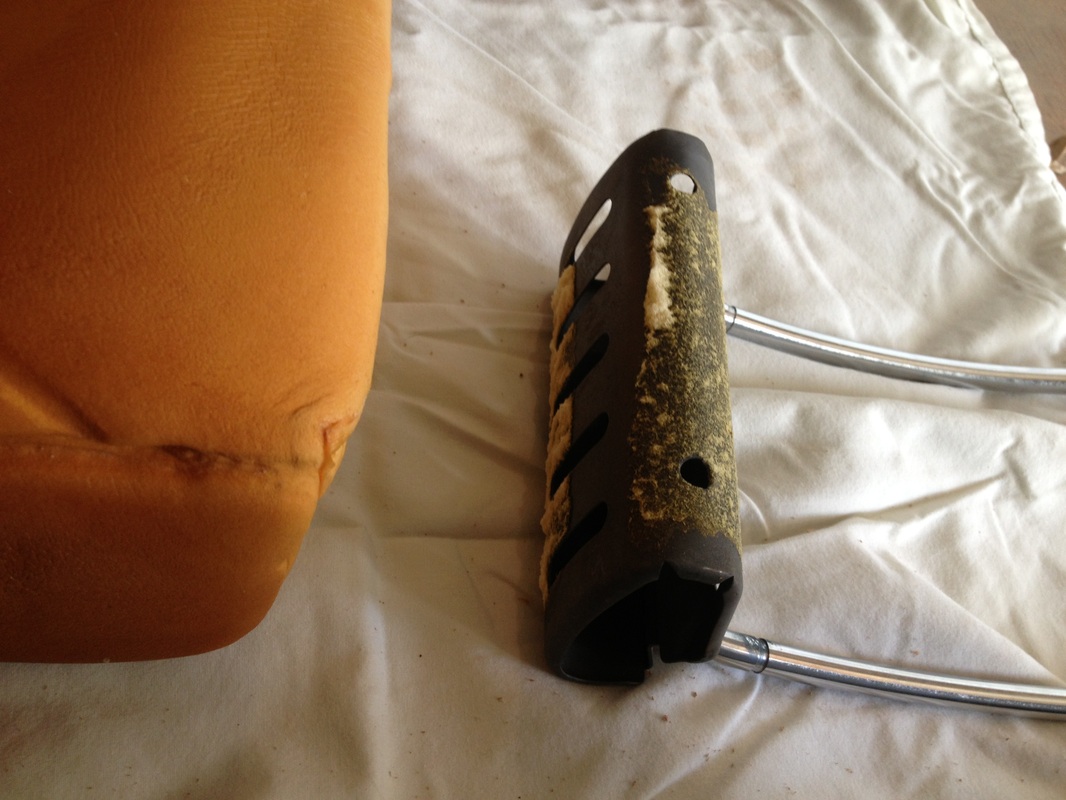
Here is my foam after the cover removal. Note some grooves from the seams and some yellowing with age. One of my foams was unglued from the metal. The other was not. Surprisingly the foam was still resilient and squishy with memory the way you would want. If your car lived more in the elements you may need to look for donor foam or you may have to spend too much to get new ones.

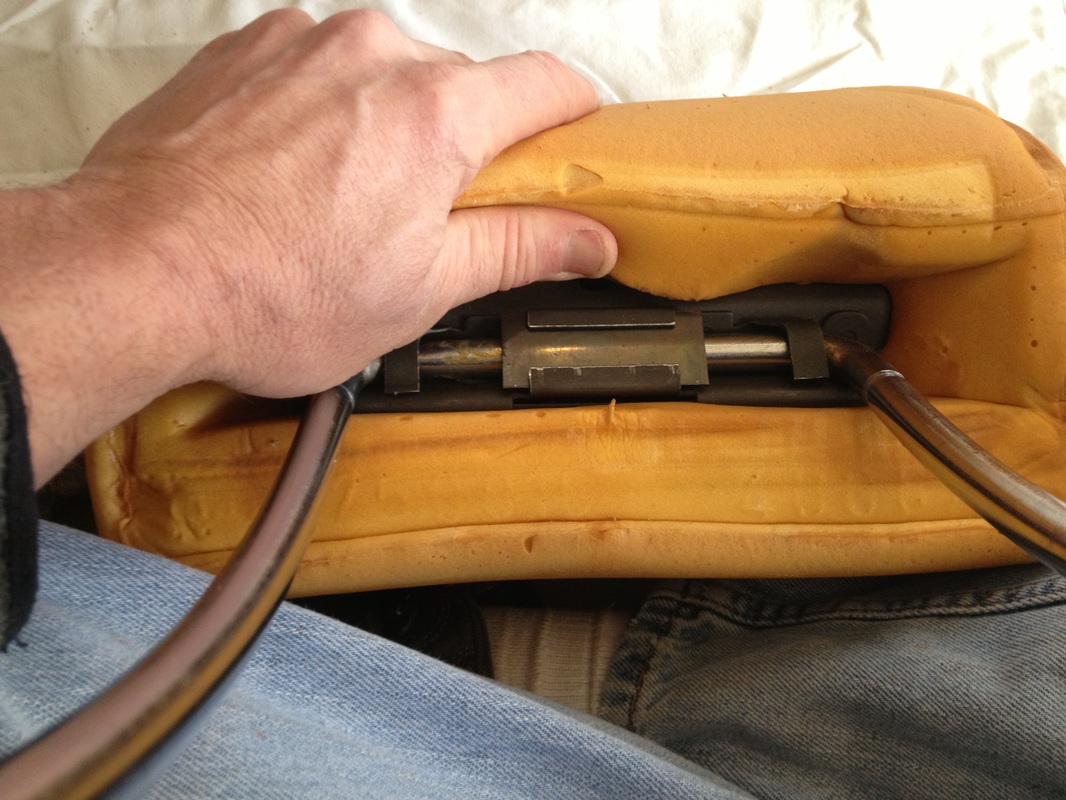
Note the metal hinge that is glued to the foam. At first I tried to get the cover on with the hinge in place. That was threatening to break my pledge to protect my foam. I realized that the easiest and safest way to do this was to disconnect the foam from the hinge, put on the cover, and then glue the hinge back in. As I mentioned one of mine was already not connected. After all; this was glued in 1979.
I carefully used my hands by sliding them in between the foam and hinge to disconnect the foam from its hinge. Please see the pictures below.
As you remove it remember your foam only goes on in one direction!
I carefully used my hands by sliding them in between the foam and hinge to disconnect the foam from its hinge. Please see the pictures below.
As you remove it remember your foam only goes on in one direction!

I carefully put the cover on checking with my photos and with the other headrest that was still in one piece. When there are pairs in car work like brakes you should always do one at a time so you have a reference if you need it. You can spray silicone on the inside of the cover to help to put the cover on, but I found this unnecessary. You also do not want silicone anywhere near where you will be gluing. I used a spray adhesive. Read the glue instructions carefully as some glues are not foam friendly. I used a 3M product that was at my local auto-parts store.
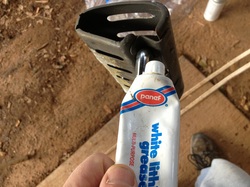
I noted that there was some ancient grease on the hinge so I used some white lithium grease on the hinge before going to the next step.
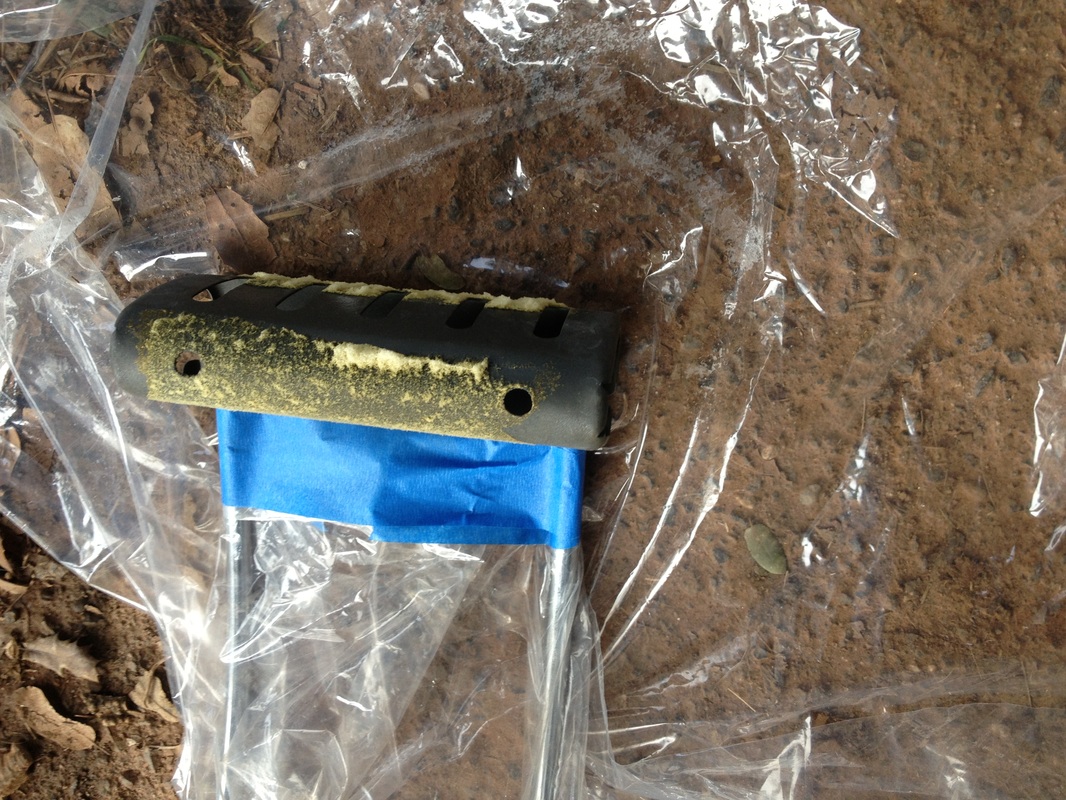
If you are using spray on adhesive prepare the hinge and the foam for spraying by masking them with tape plastic or what ever works for you.
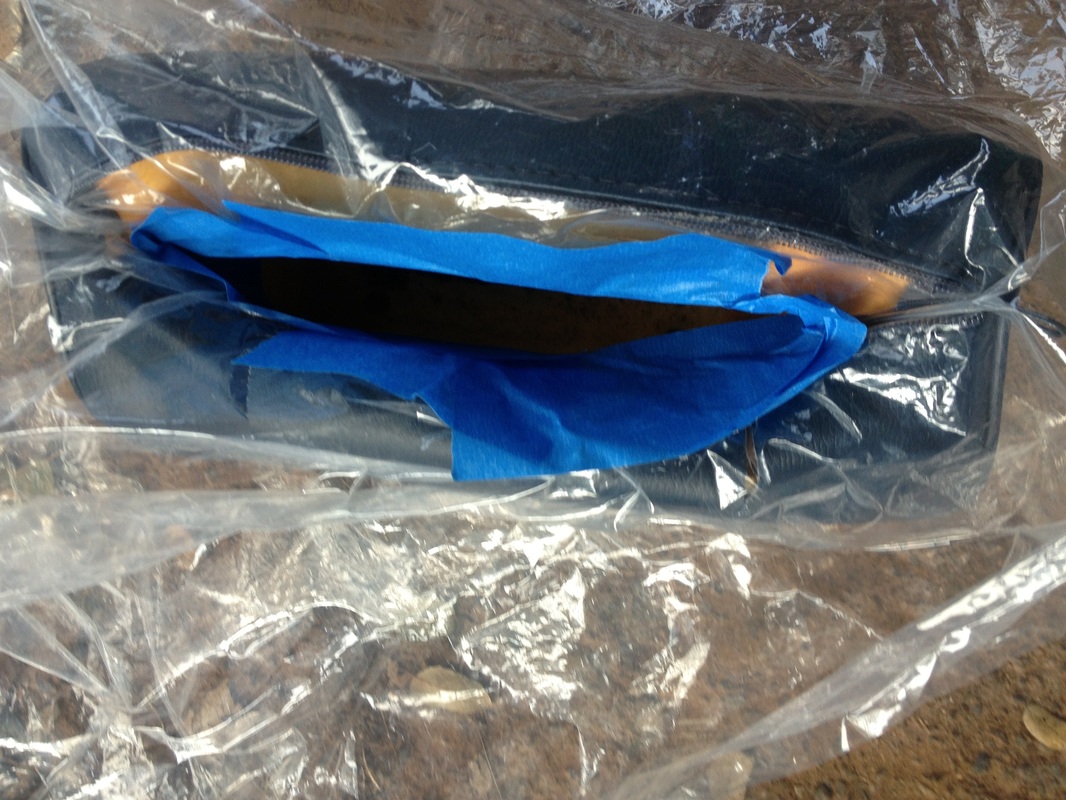

Follow the glue's directions. Mine had a couple of sprays and applying while tacky. Before you commit are you absolutely sure you are putting it in the right direction? I was able to fold the legs so that I could put the legs through the holes (yes you must put the legs in the holes in the cover first) and then I plopped mine right into the hole for the glue. Patience here!. Let the glue really dry you have done too much work to mess it all up now.
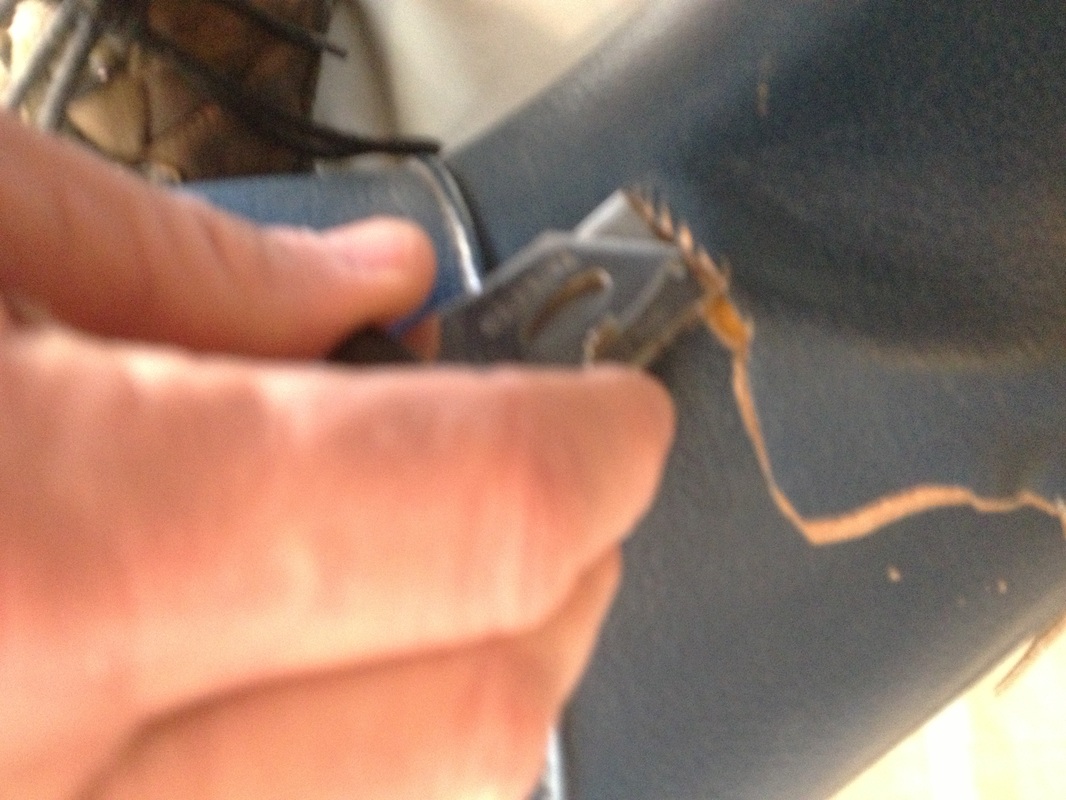
Note in this blurry picture that the zipper has a zipper pull. You will use the zipper pull once the glue is set to zip up the bottom. However; before pushing the zipper up inside the headrest you will want to use the wire cutters and cut off the zipper pull. If you do not do this the zipper pull will show as it kind of pokes against the inner part of your headrest. Your headrest may be slightly loose on the foam. You could use a heat gun to shrink the vinyl slightly, but this could have disastrous results if you overheat it. In my case I left mine alone and in a few weeks the vinyl had settled in and it now looks perfect. Remember that your results may vary and I am in no way suggesting that any of this will work for anyone else! Happy headrest restoration!
Note in this blurry picture that the zipper has a zipper pull. You will use the zipper pull once the glue is set to zip up the bottom. However; before pushing the zipper up inside the headrest you will want to use the wire cutters and cut off the zipper pull. If you do not do this the zipper pull will show as it kind of pokes against the inner part of your headrest. Your headrest may be slightly loose on the foam. You could use a heat gun to shrink the vinyl slightly, but this could have disastrous results if you overheat it. In my case I left mine alone and in a few weeks the vinyl had settled in and it now looks perfect. Remember that your results may vary and I am in no way suggesting that any of this will work for anyone else! Happy headrest restoration!