Replacing the bottom cushion or back on a driver's seat with passenger side cushions
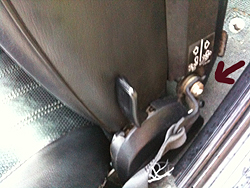
Seat belt bolt
Slide your seat back and pop off the small round black covers, if still there, over the attachment nuts. remove the nuts. Slide the seat forward and do the same for the back. Patience now! I know you want to yank that seat out. But first remove the seat belt bolt on the door side. Slow now! Gently tip the seat back and check for wires connected. Unclip these. Now you should be able to remove your seat. Be carefully as the seat has sharp pointy parts that can cut you or tear the interior of your car.
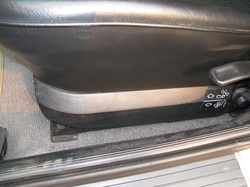
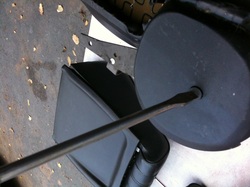
There is a black cover at the bottom that may or may not be there. It is shown in this picture and it has the little white seat directions on it. These can be easily broken off so some seats may not have them anymore. with the seat upside down you will see how to take off the cover which basically hides the sliding mechanism and also keeps things like a jacket sleeve hanging down from getting caught in the track or greasy from the track. The cover comes out by prying out a little plastic plug and then sliding the cover a little bit. New plastic plugs from BMW are cheap, but will need to be ordered ahead of time as they will not have them in stock.
Good Work Spot
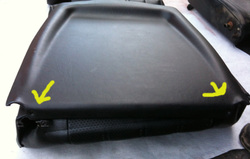
Screw location for seat back rear cover
Find a clean soft place to work. I recommend putting down a blanket. If you have a work bench as well it will save your back. Fold the seat closed and turn it over. You will see two small philips screws with washers. See yellow arrows for screw location. These are at the bottom of the seat back rear cover. You will need two have it folded forward to be able to access the two screws. Hold on to the screws little copper black washers. They may act like they are connected to the seat back, but they are only pressed in place.
Remove the Back

Location of the big philips screws
After removing the seat back cover you will be able to see the seat construction. Now you will be removing two large philips screws so that you can remove the back from the bottom cushion and the recline mechanism. Here is the first spot you could mess up. The screws have been installed with thread locker goop. Be sure you use a screw driver that is the proper large size. I then grabbed the screw driver handle with a giant pair of channel lock pliers. This allowed me the leverage to turn the screw with one hand while holding the screwdriver firmly in place with the other so that I did not strip or round off the screw. Remember when reinstalling that you should use some thread locker since these two screws are all that hold the seat back on. Now you should be able to carefully work the back off by pulling up. Take your time. If you are only replacing the seat back take the "new" one and slide it back in and reverse the removal. Note that the upper and lower cushions are identical on the passenger side.
Removing the Bottom Cushion
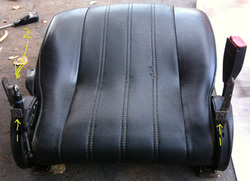
To the left is a photo of the seat bottom with the back removed the two bottom arrows point to the location of the screws you removed in the step above. The upper arrow labeled #2 shows part of what you need to maneuver around carefully as you remove the seat back. If you have not put parts in labeled zip locks, photographed as you go, and kept a completely together chair as a reference; I suggest you do that now before starting the next section.
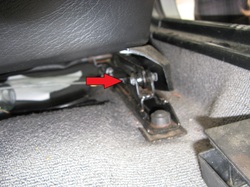
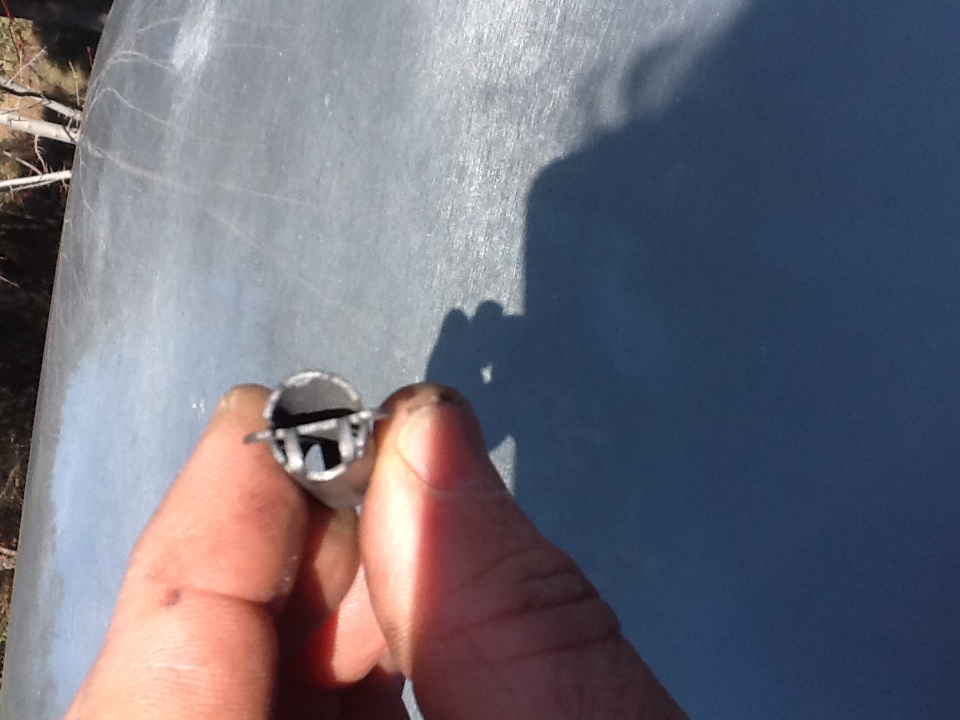
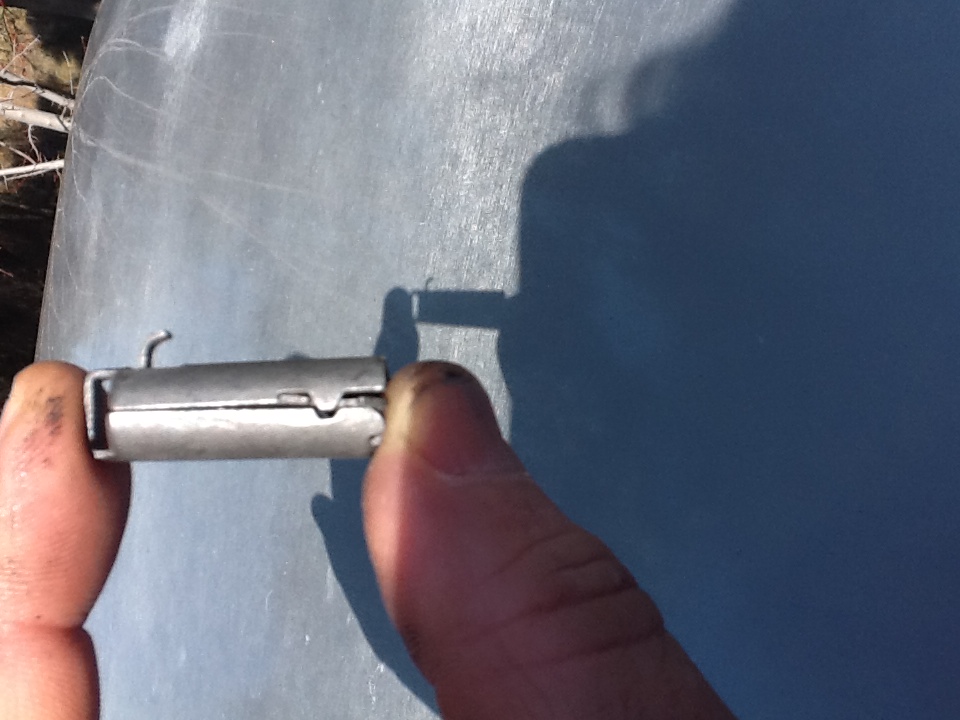
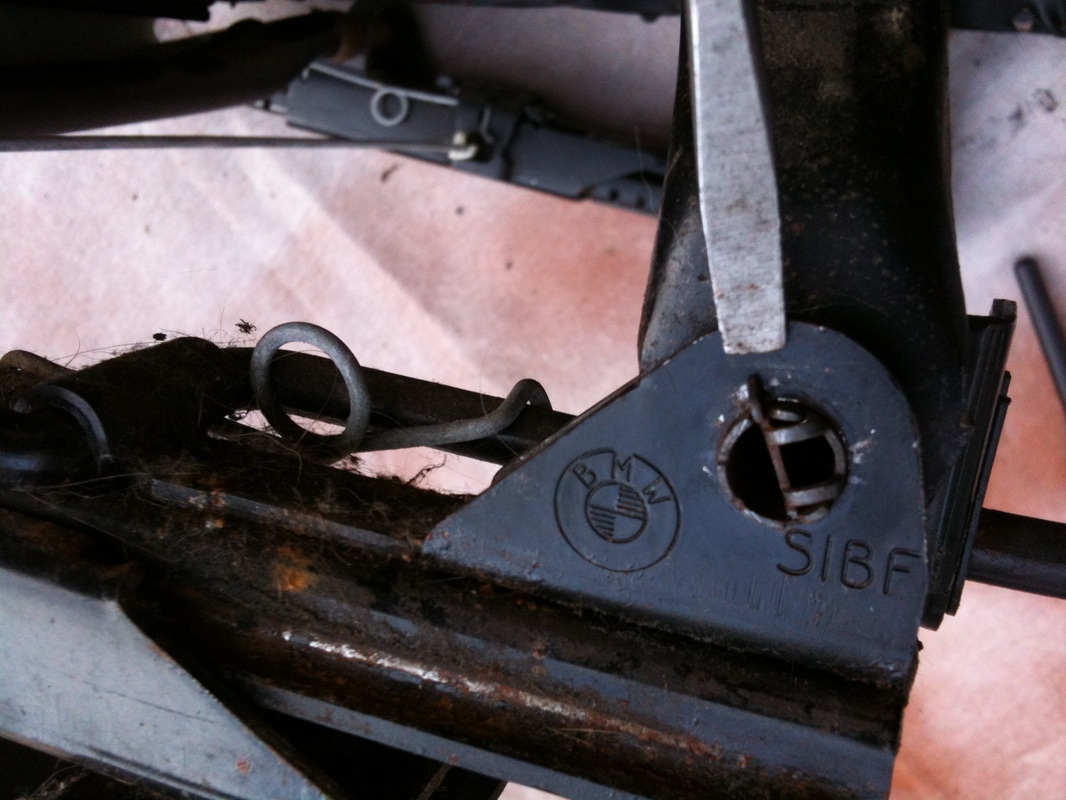
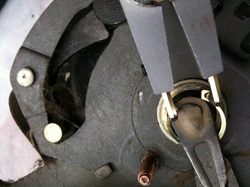
The next step is to disconnect the attachment points (one on each side) at the front of the seat bottom. This arrow is pointing at it. There are two tangs that you will break off on the inner side where the arrow is pointing. The three photos below show this item in the first photo you can see the little tangs at about 3 o'clock and 9 o'clock. You will also want to order two new ones of these from BMW. They are less then $2 each and you do not want to mess with safety when it comes to your car seats. The bottom picture on the right shows me breaking off the second tang with a screw driver and a hammer. Once you break off the tangs this tube will slide out and the front of the seat bottom will be free. There will still be a swinging bar connected at the front and you will leave that. When you put the seat back together you will simply slide the new ones in and the tangs will retract and then pop back out into place.
Remove the side covers. It looks like it is a screw but only in the loosest sense of the word. It is a little plastic screw/plug. This is another item I would consider ordering from BMW unless your is in great shape.
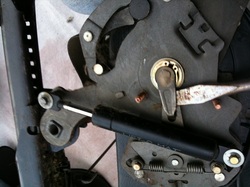
You are going to buy snap ring pliers to do this next part. Any auto parts store will have them. Do not try to do this without the right tool. Even if you are able to remove the snap ring without hurting yourself or the seat you will now have a ruined snap ring and you will still need to get it back on when you reassemble the seat. Where you will again have the opportunity to hurt yourself or ruin your seat.
This photo shows the snap ring. Notice it is like an open washer with two little holes at the open ends that is where the snap ring pliers connect. I repeat it is not worth it to try this without the proper pliers. I know about this through previous bitter experience with a different project.
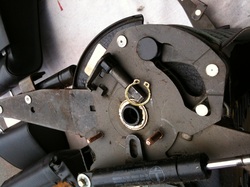
Once the snap rings are out you can pry up on this tang and you will almost be free.
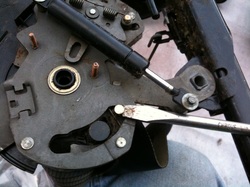
I had to slide this one silver metal thing and the mechanism was free and it came off of the seat bottom. This could be a good time to replace the seat struts that look like the things that hold up an SUV tailgate. However; unlike the other parts i have mentioned those parts are really expensive. I believe they were $50 a piece. They are what helps the seat bottom to raise as you adjust the height from the floor. Mine did not show oil leakage so I chose to properly grease everything before I put the seat back together and mine are working fine now.
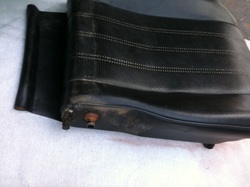
Your seat bottom will now be free. compare it to your passenger seat bottom. On mine I had to transfer a wiring harness as the passenger seat did not have the seat belt warning harness. That just required scissors and three zip ties. If you look you will see that the seat bottoms are identical. Installation is the exact reversal of what you have done.
You did document as you went? Take your time. Clean and grease parts as needed and enjoy your "new" seat!
You did document as you went? Take your time. Clean and grease parts as needed and enjoy your "new" seat!